# Create and manage teams
For each project, you can create one or more teams to work on it.
# Create a new team within a project
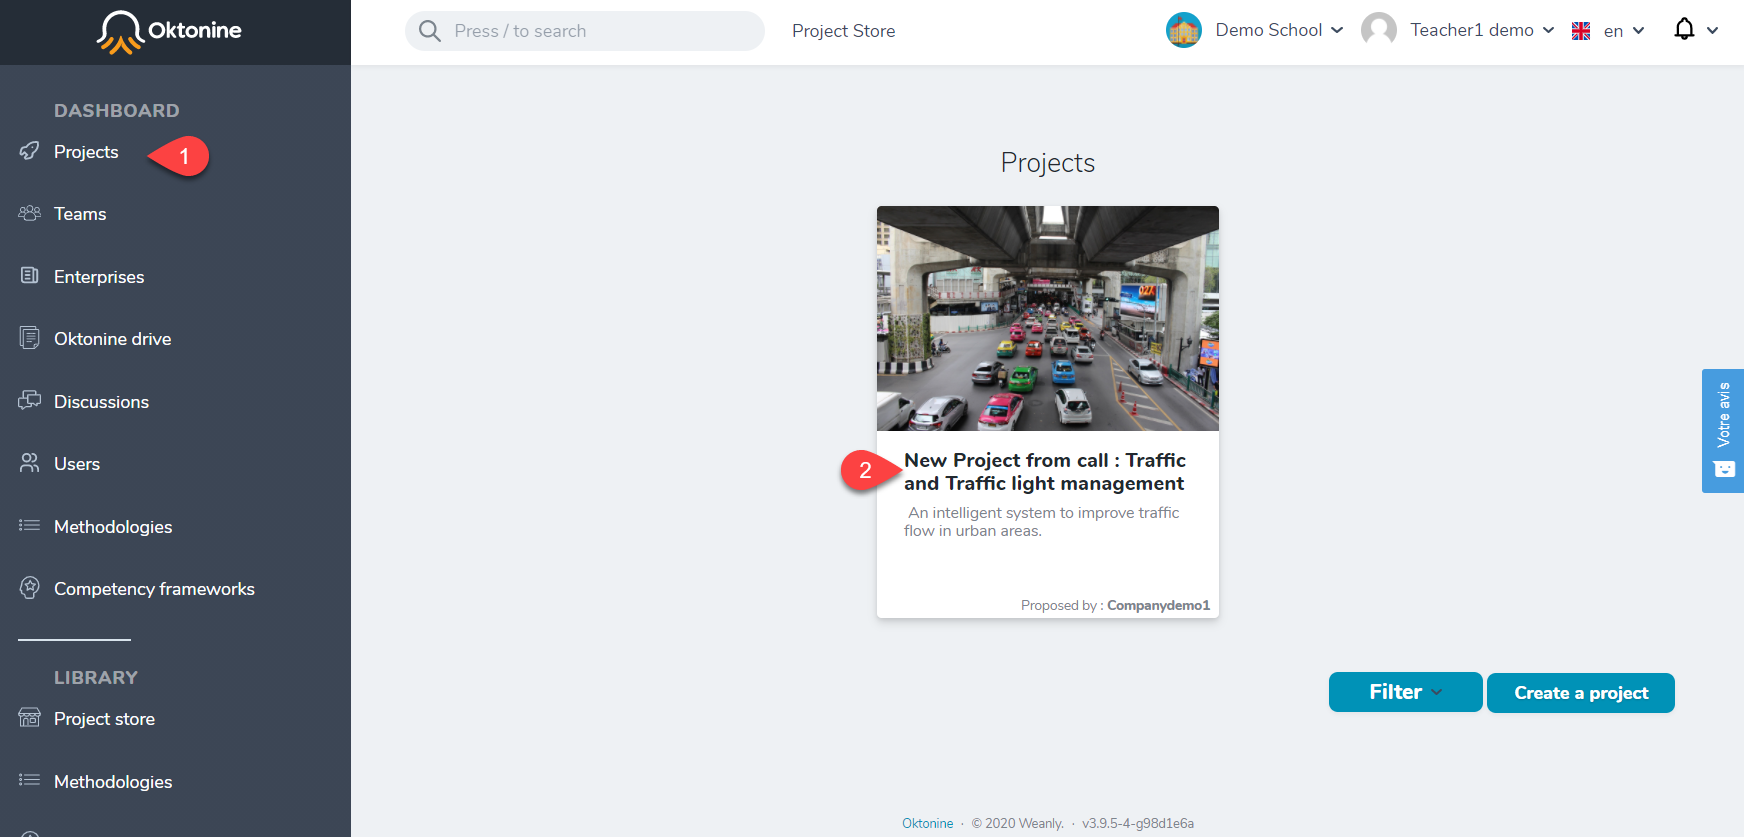
To create a new team for your project, go to the Projects element of the menu, and open your project.
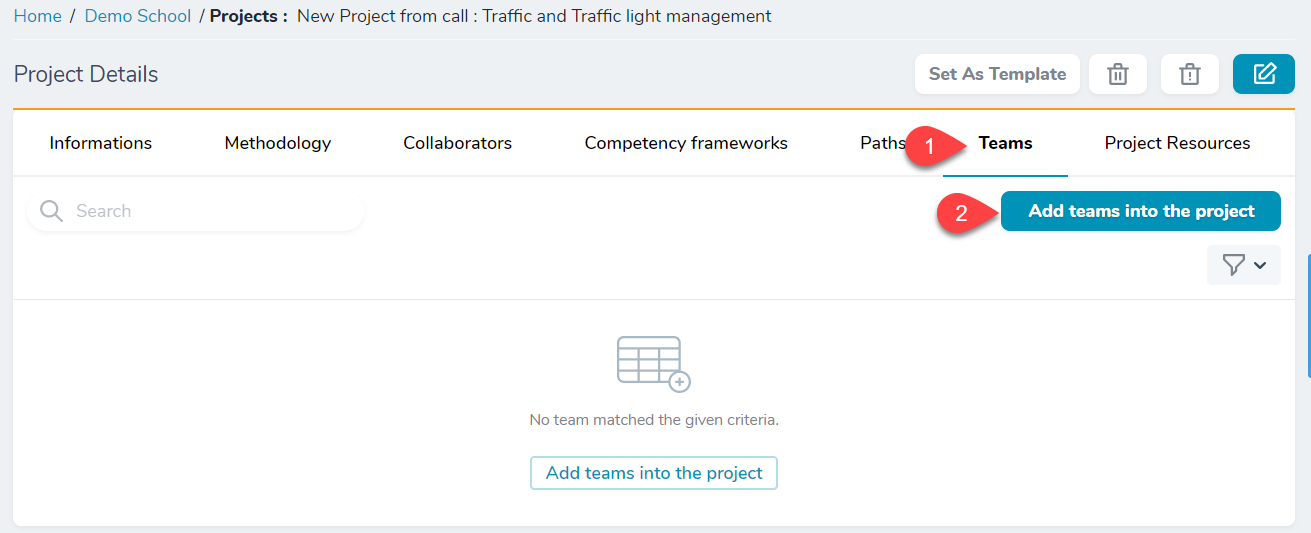
Go then to the teams tab and click on Add a team to the project.
Give a name to the team and click on create or on create and create another to add another team.

# Assign students to a team
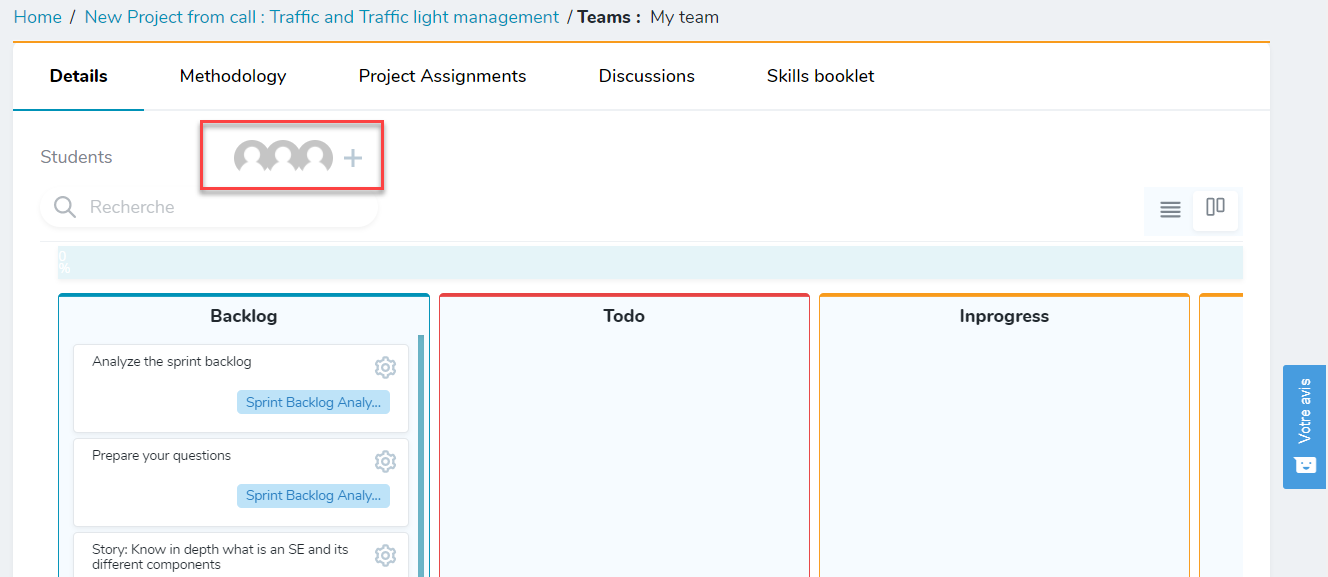
Once a team is added to a project, you have to assign students to it. Click on the + icon to do that.
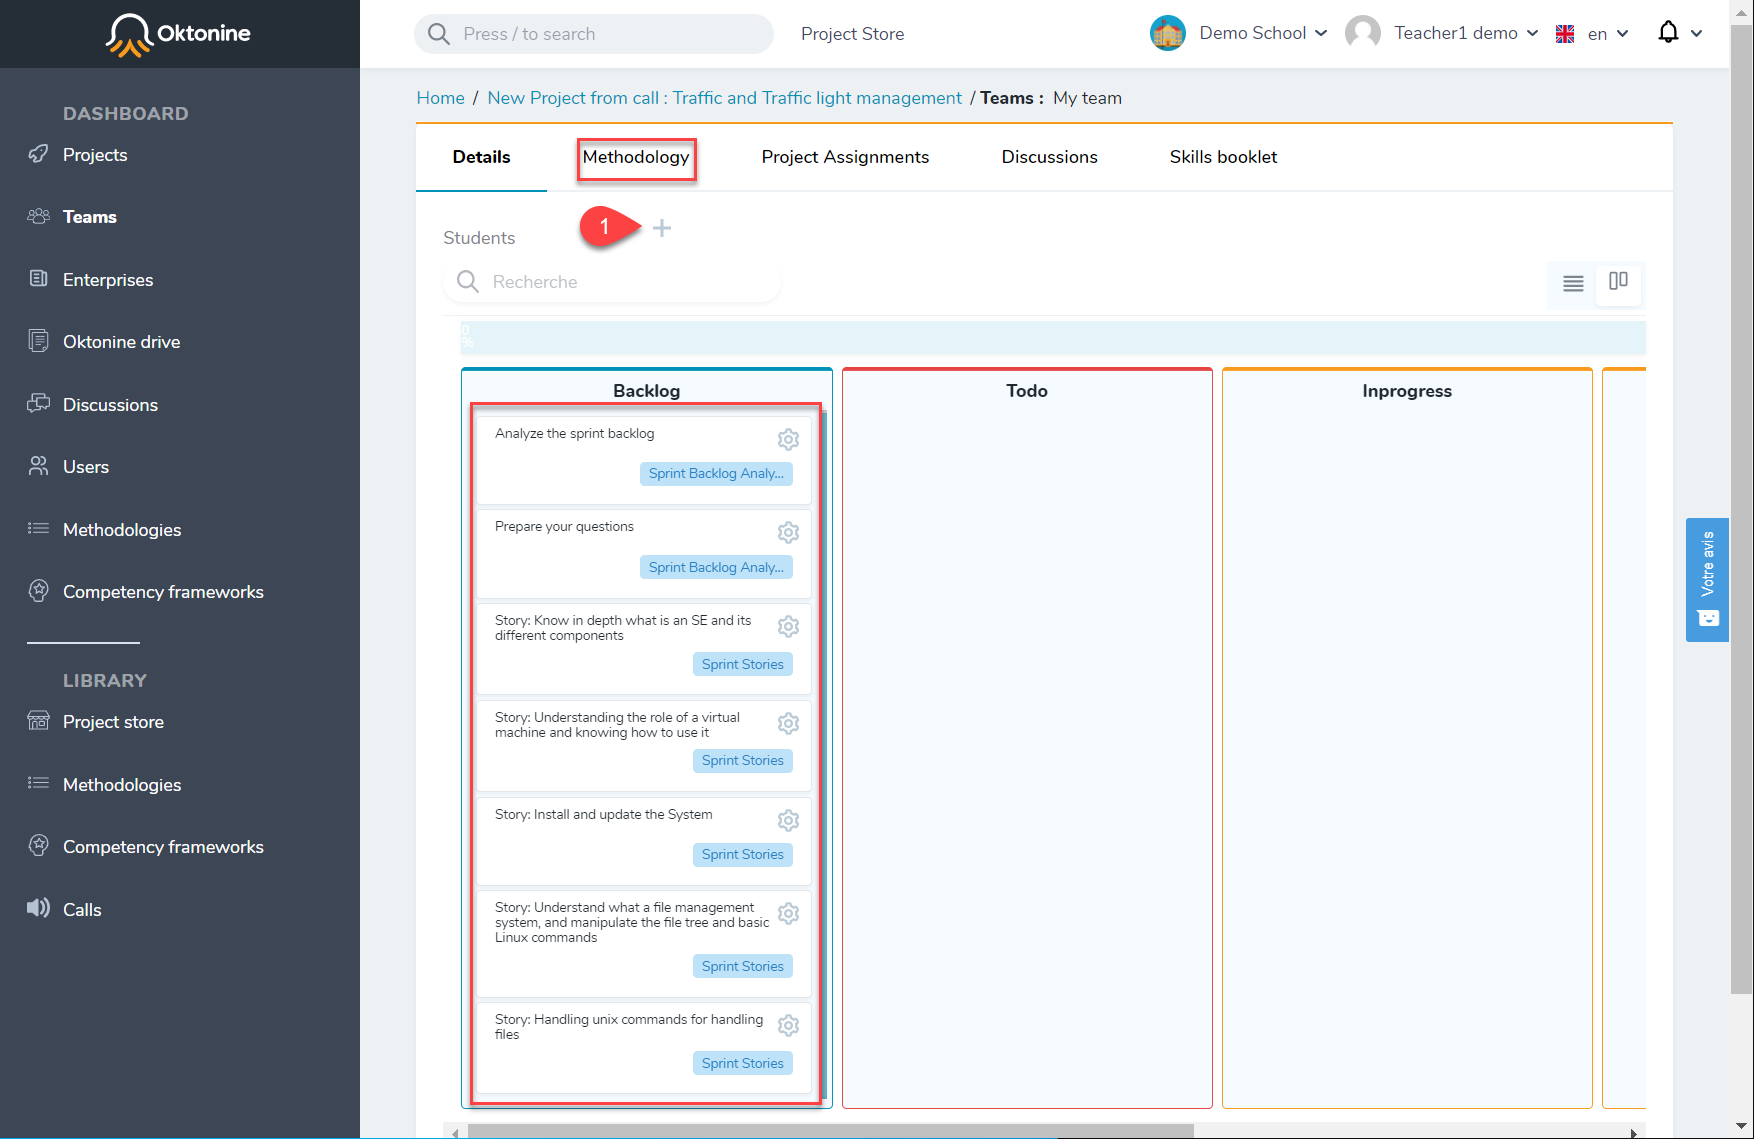 (Note that the methodology you already assigned to the project will be automatically added for each new team. Its activities will be automatically added to the
 backlog tab.)
You can search for students you want to add one by one.

Students assigned to a team will be visible in the team's environment.
# Visualize a team's work
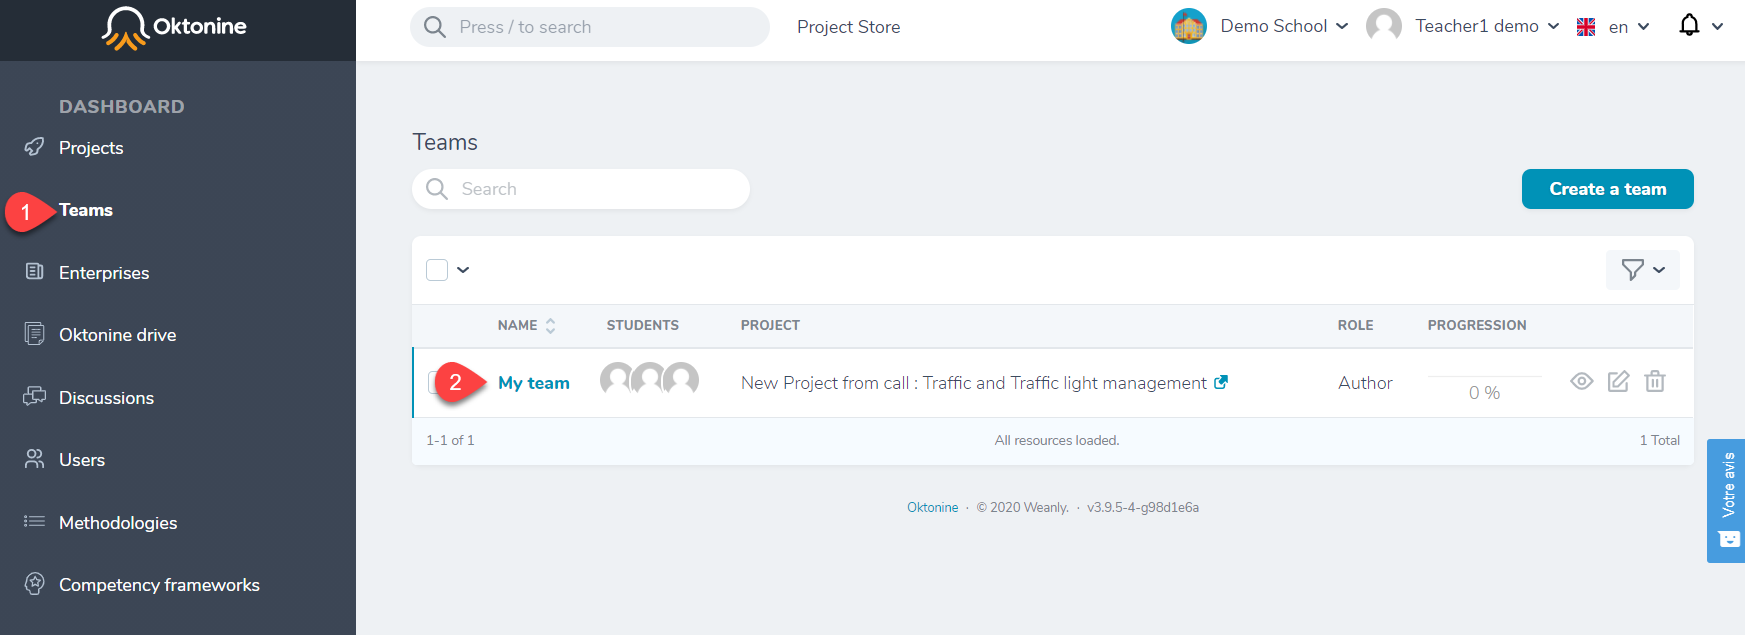
To access a team's environment, go to teams at the left menu, and click on any team from the list.
The team's environment looks like that :
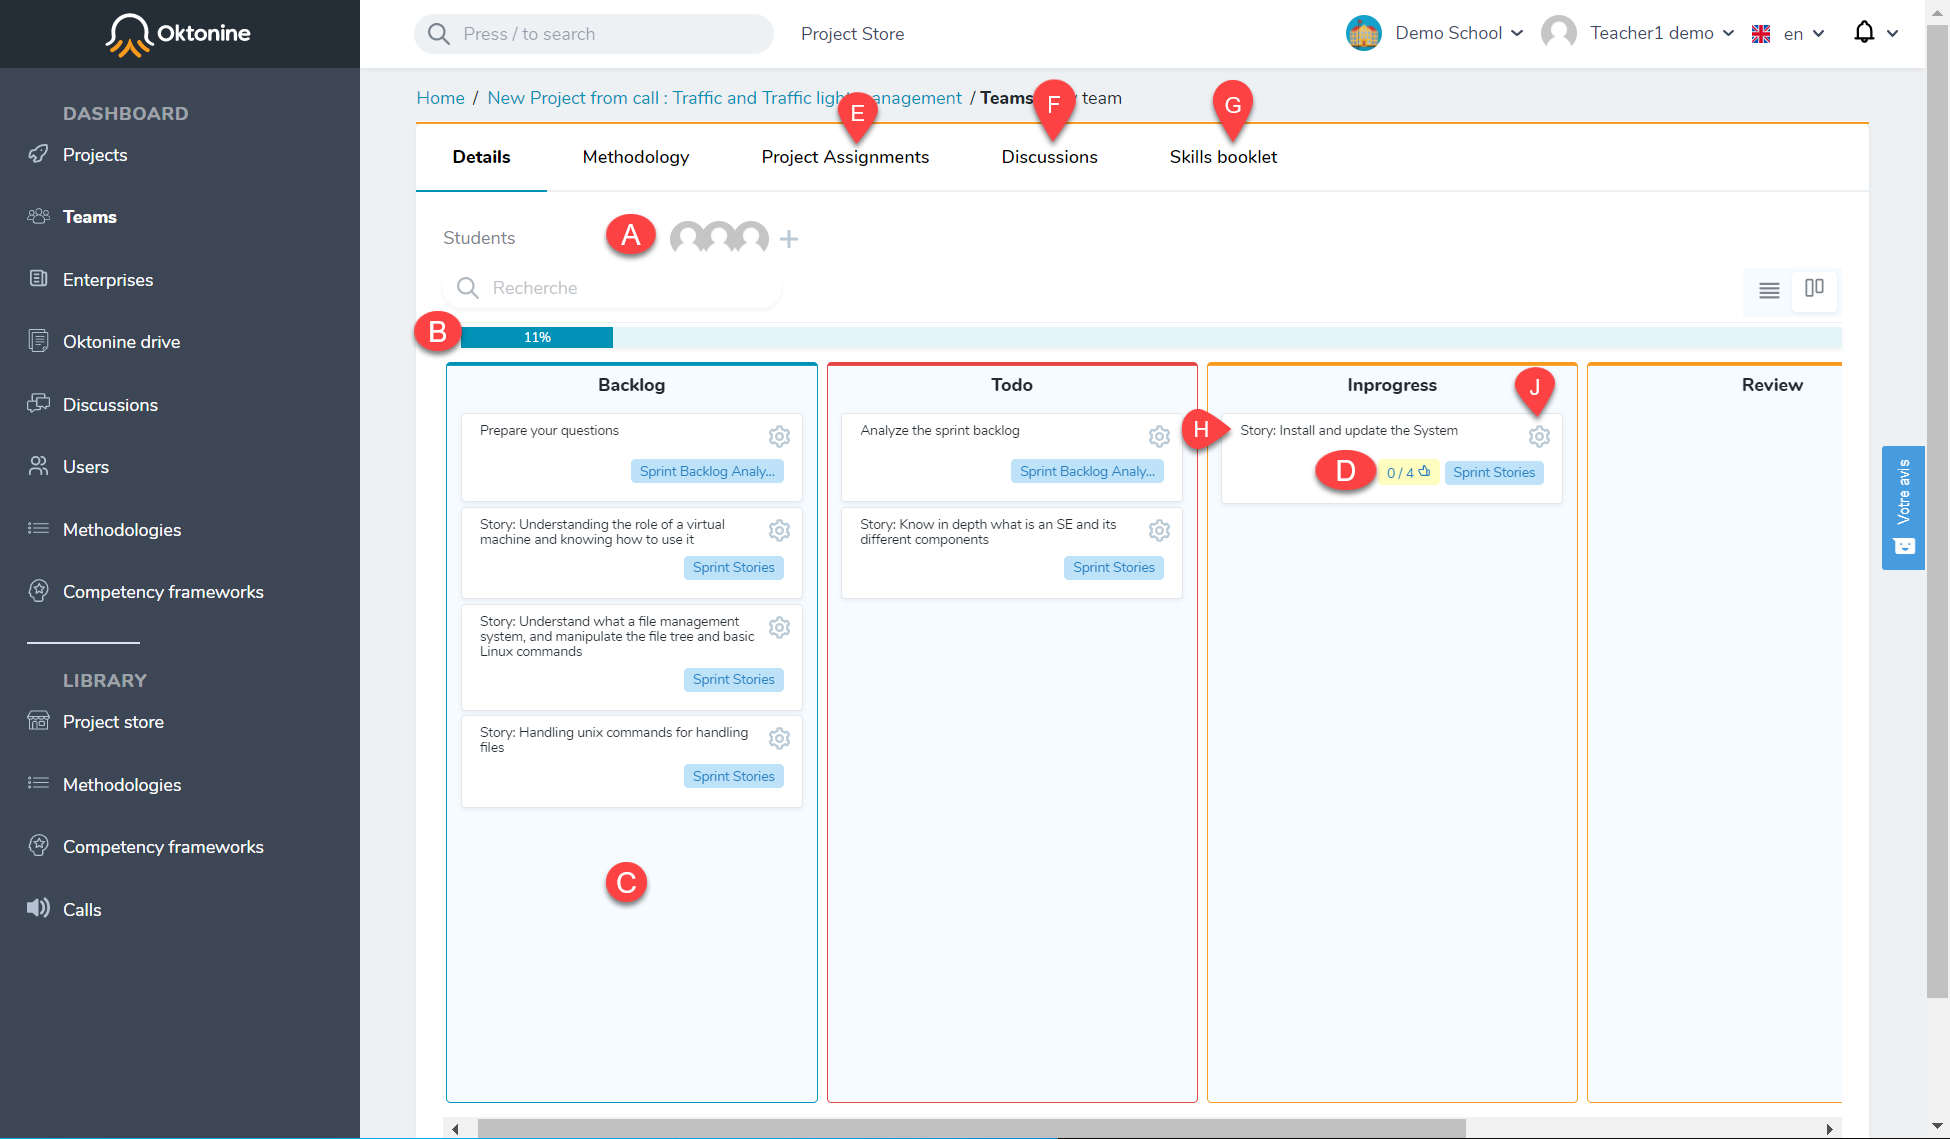
- A: Team's students
- B: Team's progression
- C: Team's activities (issued from the methodology)
- D: Number of competencies attached to an activity; by clicking on this icon, you can validate the acquired competencies.
- E: Project delivrables (all the delivrables attached to the project's activities)
- F: Discussions of the team
- G: Competencies validated by the team (Register of competencies)
- H: An activity issued from the methodology, with the state
In progress. - J: By clicking on this icon, you can validate the acquired competencies
# Competencies validation
To validate the competencies acquired within a specific activity, start by checking the team's deliverables within this activity. Check the boxes relative to

Then, open the competencies' validation space (J: By clicking on this icon, you can validate the acquired competencies). Check the boxes related to the competencies you want to validate
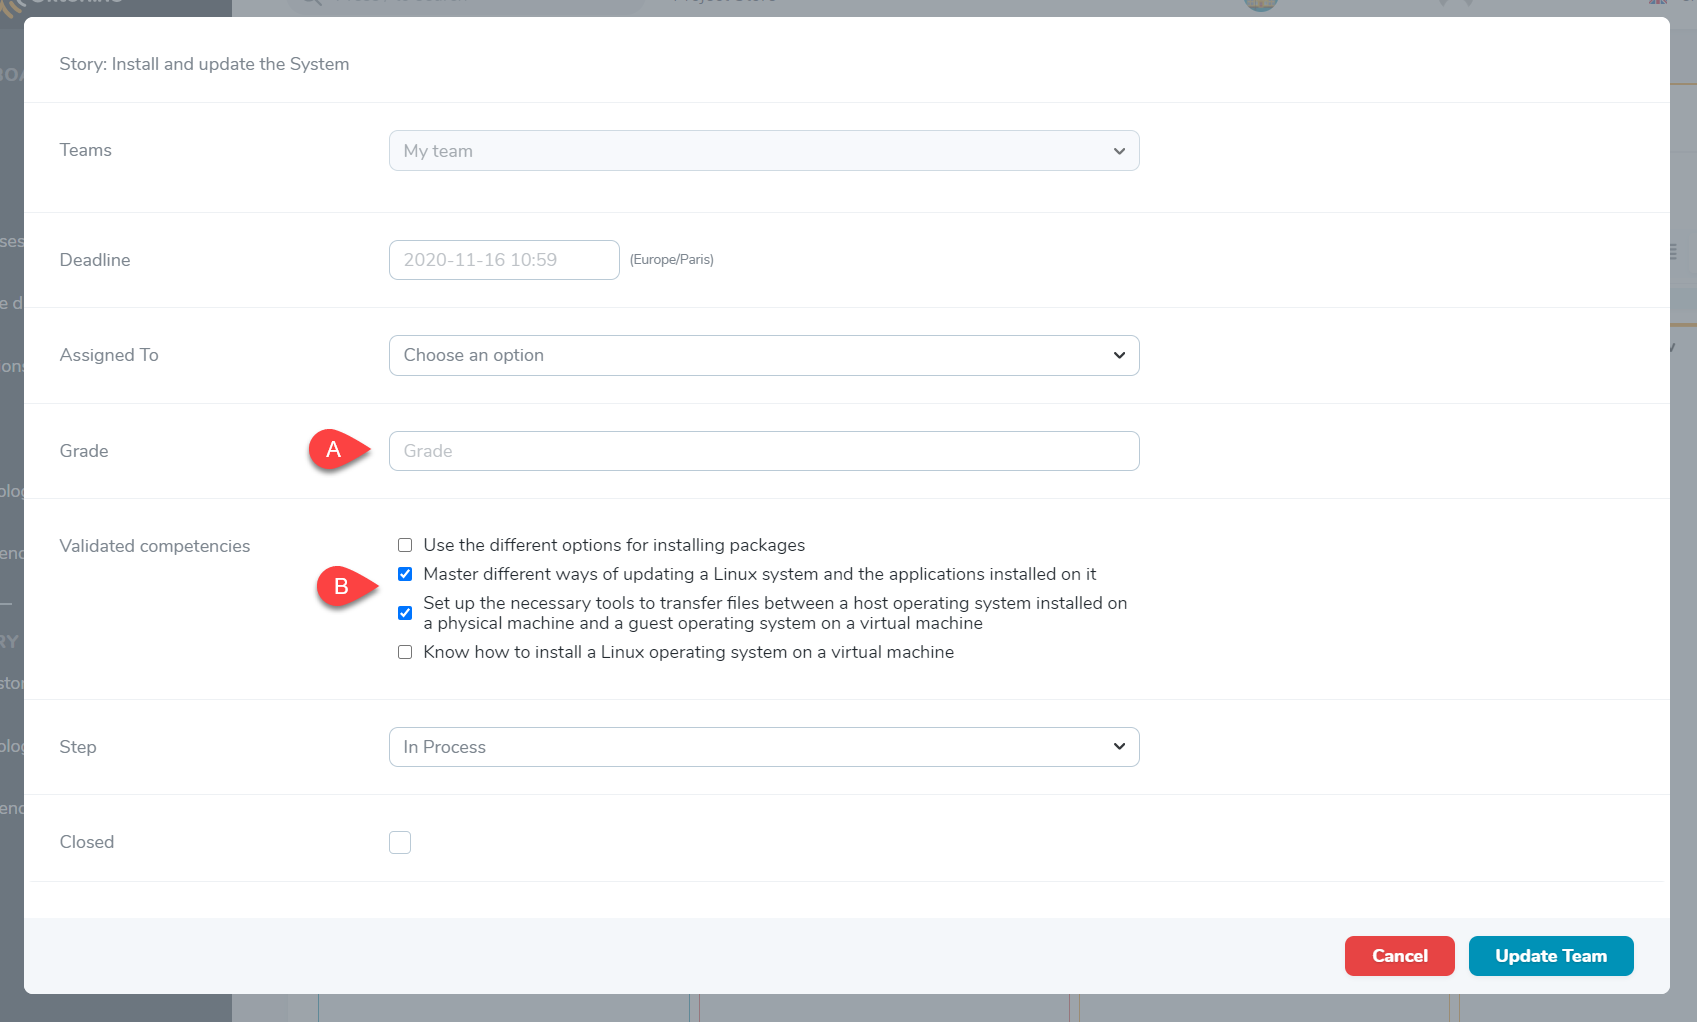
The validated competencies will be automatically added to the register of competencies
